You will learn
How to connect NextTables to a Databricks database in Lakebase (Databricks' embedded Postgres) by creating a native Postgres login role in Databricks and then adding a validated, folder-scoped database connection in NextTables. Once connected, business teams can maintain data directly on the platform — validated, authorised, and auditable.
Prerequisites
- The Manage databases authorisation on Site level in NextTables.
- A Databricks workspace with a Lakebase database (Postgres) for NextTables.
- Native Postgres role login enabled on that Lakebase database, plus a Postgres login role (username + password) scoped with read and write access to the schema NextTables will use.
- The Lakebase connection details: instance name, host, port, schema, username, and password.
- Network access from NextTables to your Lakebase endpoint. You may need to allowlist the NextTables IP (find it at the top of the connection sheet in NextTables) in your data platform or network.
⚠️ Caution: NextTables connects to Databricks Lakebase using native Postgres username and password authentication. Token-based (OAuth) authentication is not supported, so you must enable native Postgres role login in Lakebase and create a login role.
Step-by-Step Instructions
1) Create a database for NextTables in Databricks Lakebase
- In Databricks, open Lakebase and create a Postgres database for NextTables to connect to.
- Follow Databricks' own documentation for the current steps: Lakebase Postgres.
2) Enable native Postgres role login in Lakebase
- In your Lakebase database settings, turn on native Postgres role login so the database accepts username and password authentication.
- See Databricks' guide: Authenticate to a Lakebase database.
3) Create a login role scoped to your schema
- Using a SQL client, create a Postgres role with login and a password, then grant read and write on the single schema NextTables will use.
- Keep the role least-privilege — scope it to that one schema rather than the whole database.
- See Databricks' guides: Create Postgres roles and Manage database permissions.
- Note down the instance name, host, port, schema, username, and password — you'll need these in NextTables.
💡 Tip: Create a dedicated role per connection (for example, one for HR and one for Finance) and scope each to its schema. This keeps access auditable and makes it easy to rotate credentials later.
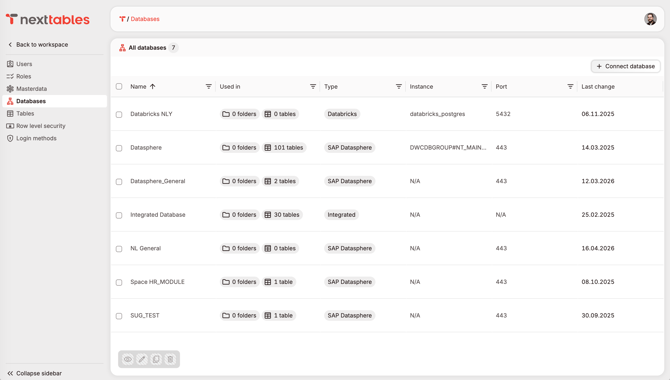
4) Open the Databases area in NextTables
- Click your profile avatar in the top-right corner.
- Click Administration.
- In the left sidebar, click Databases.
- You'll see your list of connected databases (an empty list if none are connected yet).
 5) Start a new database connection
- Click Connect database in the top-right corner of the page.
- The Connect new database panel opens on the right. It notes that you may need to allowlist the NextTables IP in your data platform or network.
- Under Basic info, enter a Name for the connection (for example, My Databricks Connection).
- Set Type → Databricks.
6) Set the folder scope (optional)
- Use Mapped folders to control where the connection is available. The default is Site (all folders).
- To restrict it, remove Site (all folders) and select one or more specific folders, so the connection is only available there.
- For details, see Scoping Database Connections to Folders in Additional Resources.
💡 Tip: For sensitive data (for example, HR or finance), scope the connection to a dedicated folder instead of making it available everywhere.
7) Enter the connection details
- Once you select Databricks, the rest of the form unlocks. Under Connection details, enter the values from Step 3:
- Instance name — your Lakebase database instance (for example, databricks_postgres)
- Host — for example, db.example.com
- Port — for example, 5432
- Schema — the schema your login role can read and write
- (Optional) Leave Read-only connection unchecked to allow data maintenance. If you tick it, data-editing features are disabled in folders and tables that use this connection.
- Under Authentication, enter the Username and Password of the Lakebase login role from Step 3.
8) Connect and confirm
- Click Connect database.
- NextTables tests the connection internally. If the test succeeds, the connection is added and you are notified of the success.
- From here, you can connect existing tables or create new tables with NextTables in Databricks.
Troubleshooting / FAQs
Q: The connection test fails when I click Connect.
A: Check the most common causes: the NextTables IP (find it at the top of the connection sheet) is not allowlisted in your data platform or network; native Postgres role login is not enabled in Lakebase (Step 2); the instance name, host, port, or schema is incorrect; the login role does not have read/write on the schema; or the password is wrong. Correct the value and click Connect database again.
Q: I don't see the Databases option, or I can't add a connection.
A: You need the Manage databases authorisation on Site level. Ask a site administrator to grant it.
Q: Can I use a Databricks token instead of a username and password?
A: No. NextTables uses native Postgres username and password authentication for Databricks Lakebase. Token-based (OAuth) authentication is not supported, so enable native Postgres role login and create a login role.
Q: The connection works, but I can't create or edit tables.
A: The Postgres login role needs read and write privileges on the target schema. Re-grant read/write to the role in Lakebase (see Step 3) and reconnect.
Additional Resources
Scoping Database Connections to Folders
How to limit a database connection to a specific folder so it is only available to applications in that folder.
How to Create and Use Master Data Objects in NextTables
How to build master data objects on a connected table to standardise reference data.
How to Create and Use Row-Level Security Objects (RLSO) in NextTables
How to control which rows each user can see and edit using row-level security objects.