
📝 Availability: NextTables for SAP BW, Professional and Enterprise editions.
You will learn
How to move a NextTables configuration from your development system to test and production: what travels, what has to be assigned to the application before it can travel, and how to run the transport program for a configuration and for a table template.
This article is for whoever administers NextTables and has access to the ABAP editor.
Prerequisites
- A configured NextTables application in the source system. Table and column configuration in NextTables for SAP BW covers the settings themselves.
- Access to transaction SE38 and a modifiable transport request.
- Every menu entry and every setting you want to move must be assigned to the application you are transporting. Anything not assigned to it is simply not part of the transport.
What travels
The transport program moves:
- the application itself
- its menu entries and their descriptions
- the table configuration and the settings of individual fields
- templates, in a separate run
It produces a transportable program that inserts the application's configuration entries into the target system when the transport is imported. Where the application already exists in the target, old entries are removed first, so the target ends up matching the source rather than merging with it.
⚠️ The import replaces, it does not merge. Configuration made directly in the target system for the same application is removed when the transport arrives. Treat the development system as the only place where the configuration is edited.
Step-by-Step Instructions
1. Start the transport program
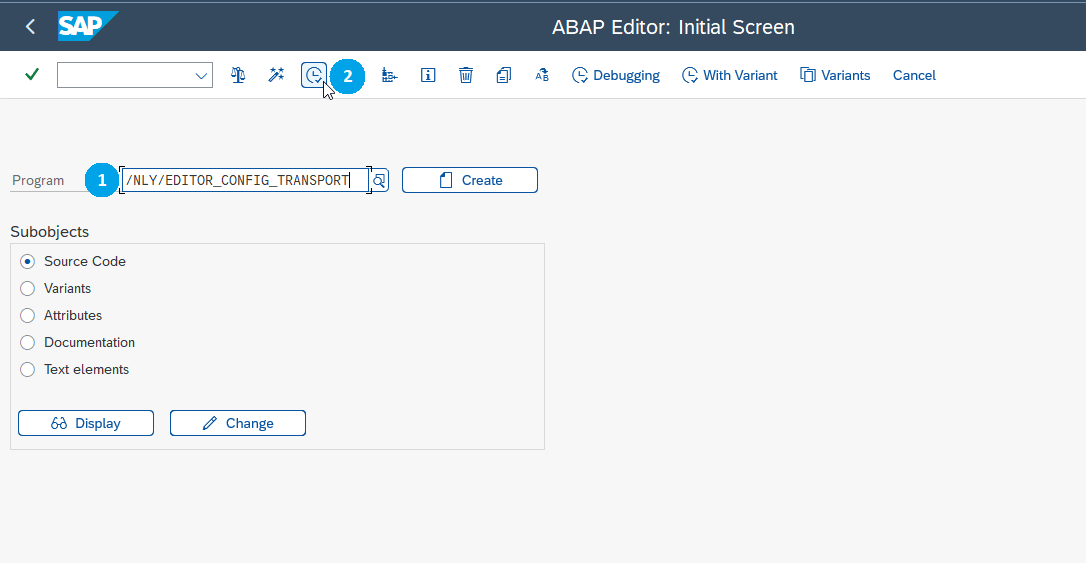
Run transaction SE38, enter the program /NLY/EDITOR_CONFIG_TRANSPORT and execute it.
2. Choose what to transport
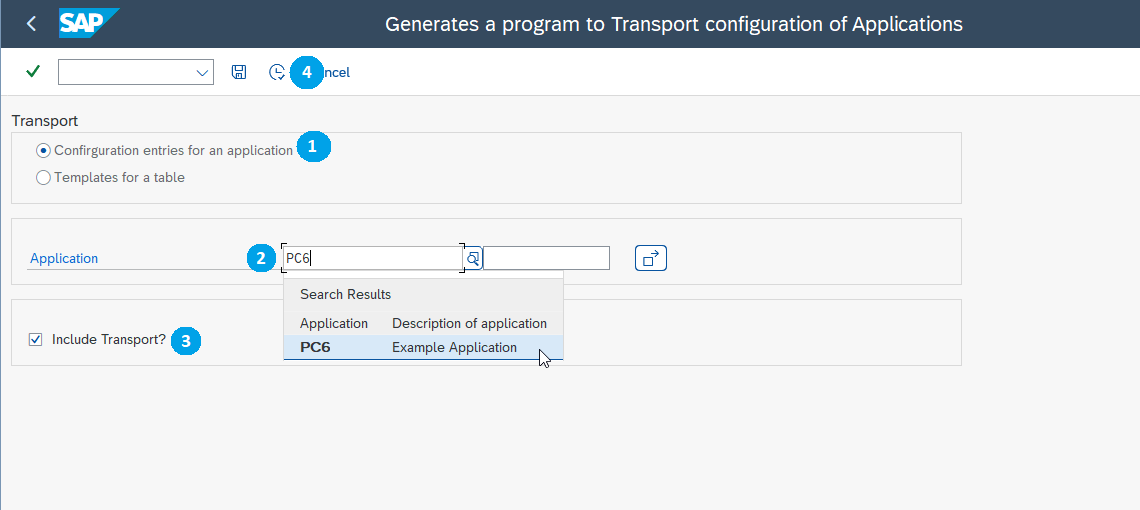
The selection screen offers a configuration or templates. For a configuration, select it, enter the application to transport, for example PC6, and tick Include Transport?. Then execute.
3. Pick the transport request
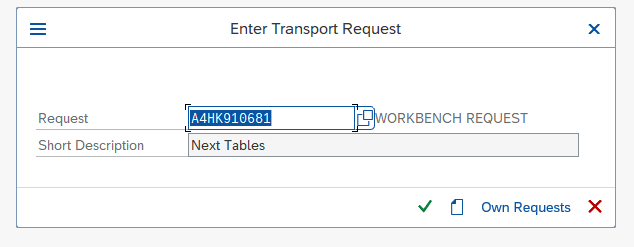
Select the request the generated program should be attached to.
4. Transport a template
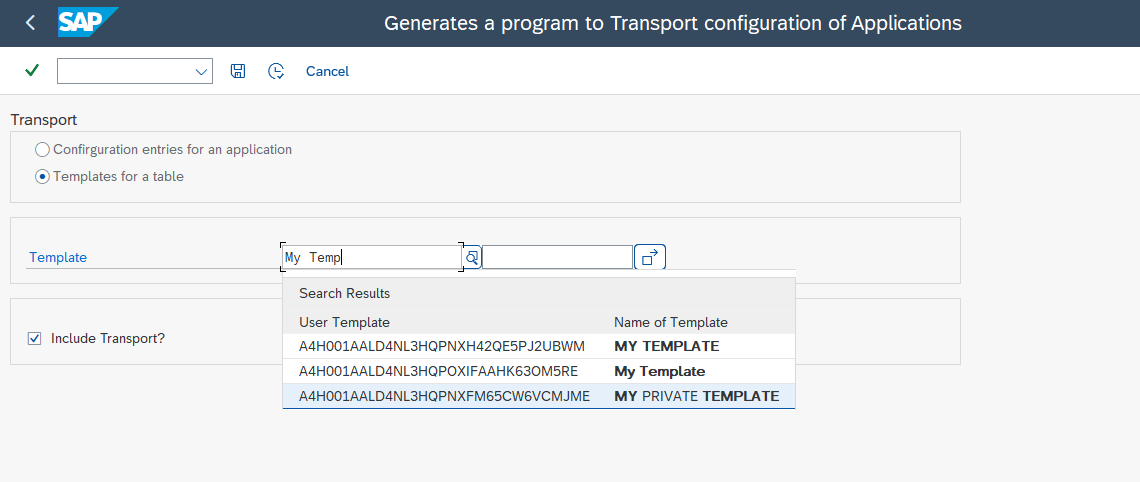
Templates work the same way, in their own run. Select templates for table and enter the template name, then pick a request as before.
5. Release and import
Release the request and import it in the target system as usual. Then open the application in the target and check that the menu entries and column settings arrived, because anything that was not assigned to the application will silently be missing.
Troubleshooting / FAQs
1. Some menu entries did not arrive in the target system.
They were not assigned to the transported application. Assignment to the application is what makes an entry part of the transport; the program has no other way to know an entry belongs to it. Assign them in the source system and transport again.
2. Configuration I made in the production system disappeared.
The import replaces the application's entries rather than merging them. Make configuration changes in the development system and transport them forward.
3. My template did not come along with the configuration.
Templates are a separate run of the same program. Select templates for table, enter the template name, and attach it to a request of its own or the same one.
4. Do I need to transport anything else for a table to work?
The underlying objects have to exist in the target system by their normal route: the ADSO or DDIC table, the InfoObjects, and any BAdI implementation, which travels as an ABAP object in its own transport. This program moves the NextTables configuration, not the objects it points at.